Master the Art of Bearing Buddy Installation: A Comprehensive Guide
Introduction
Proper maintenance of your trailer bearings is crucial for ensuring a safe and smooth towing experience. One of the most important components in this maintenance routine is the bearing buddy, a device that protects your bearings from water contamination. Installing a bearing buddy may seem daunting at first, but with the right tools and know-how, you can do it yourself and reap the benefits of trouble-free trailering. This comprehensive guide will provide you with step-by-step instructions, expert tips, and common mistakes to avoid for a successful bearing buddy installation.
Step-by-Step Installation Guide
Materials Required:
- Bearing buddy kit
- Trailer jack
- Wheel chocks
- Wrench
- Hammer
- Grease gun
- Grease
- Sealant
Instructions:
-
Safety First: Securely park your trailer on a level surface and engage the parking brake. Place wheel chocks behind the wheels opposite the one you'll be working on.
-
Lift the Trailer: Position the trailer jack under the frame near the target wheel and raise it until the tire is slightly off the ground.
-
Remove the Wheel: Using a wrench, loosen the lug nuts but do not remove them completely. Lift the wheel straight up and off the axle.
-
Inspect the Bearing: Before installing the bearing buddy, check the wheel bearing for damage or wear. Replace it if necessary.

-
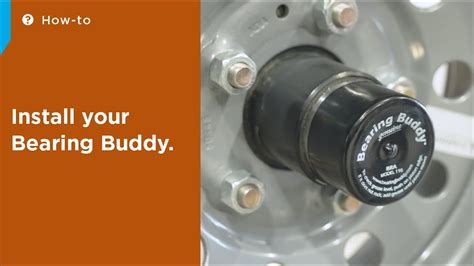
Mount the Bearing Buddy: Align the bearing buddy with the hub and slide it over the axle. Secure the bearing buddy with the supplied bolts or screws.

-
Install the Sealant: Apply a bead of sealant around the base of the bearing buddy to prevent leaks.
-
Lubricate the Bearing: Fill the bearing buddy reservoir with wheel bearing grease.
-
Reinstall the Wheel: Slide the wheel back onto the axle and tighten the lug nuts by hand. Use the wrench to fully tighten the nuts in a star pattern.
-
Lower the Trailer: Slowly lower the trailer using the jack. Remove the jack and wheel chocks.
-
Test the Bearing Buddy: Rotate the wheel by hand to ensure it spins smoothly and without any grinding noises.
Why Installing a Bearing Buddy Matters
Installing a bearing buddy offers several key advantages that can improve the longevity and safety of your trailer:
-
Prevents Water Contamination: Bearing buddies form a seal around the hub, preventing water and contaminants from reaching the delicate bearings.
-
Reduces Bearing Failure: Water contamination is a primary cause of bearing failure. By keeping the bearings dry, bearing buddies significantly reduce the risk of costly repairs or roadside breakdowns.
-
Extends Bearing Life: Protected from water and contaminants, bearings can last for extended periods, minimizing maintenance costs and downtime.
Common Mistakes to Avoid
-
Overfilling the Reservoir: Avoid overfilling the bearing buddy reservoir, as excessive grease can create pressure buildup and damage the bearings.
-
Using the Wrong Grease: Always use high-quality wheel bearing grease specifically designed for marine or trailer applications.
-
Tightening the Lug Nuts Too Loosely: Loose lug nuts can cause the wheel to wobble, damaging the bearings and other components.
-
Forgetting to Apply Sealant: Sealant is crucial for preventing leaks and ensuring long-term protection.
Benefits of Installing a Bearing Buddy
The benefits of installing a bearing buddy far outweigh the effort involved:
-
Improved Towing Safety: Well-maintained bearings contribute to smooth towing and reduce the risk of catastrophic failures while on the road.
-
Reduced Maintenance Costs: By preventing bearing failure and extending their lifespan, bearing buddies save you money on maintenance and repairs.
-
Increased Trailer Value: A properly maintained trailer with bearing buddies is more attractive to potential buyers, increasing its resale value.
Comparison: Pros and Cons
| Pros |
Cons |
| Prevents water contamination |
Can be messy to install |
| Extends bearing life |
Requires regular maintenance |
| Reduces maintenance costs |
May not fit all trailer hubs |
| Improved towing safety |
Can be expensive |
Humorous Stories and Lessons Learned
-
The Missing Sealant: One seasoned trailer owner forgot to apply sealant around the bearing buddy. During a heavy rainstorm, water seeped into the hub, causing the bearings to corrode and seize up. The lesson learned: never underestimate the power of sealant!
-
The Overzealous Grease Monkey: Another trailer enthusiast enthusiastically filled the bearing buddy to the brim with grease. The excessive pressure ruptured the hub seal and spewed grease all over the wheel. The lesson learned: follow the manufacturer's instructions for proper grease quantity.
-
The Rusty Lug Nuts: A novice trailer owner neglected to tighten the lug nuts properly after installing a bearing buddy. The loose nuts allowed the wheel to wobble, causing the bearings to wear prematurely. The lesson learned: always double-check that all bolts and nuts are properly tightened.
Conclusion
Installing a bearing buddy is an essential maintenance task for any trailer owner. By following the step-by-step instructions, avoiding common mistakes, and considering the benefits, you can ensure that your trailer bearings remain protected and your towing experiences are safe and enjoyable. Remember, a well-maintained trailer with bearing buddies will provide you with peace of mind and keep you on the road for years to come.
Additional Resources
