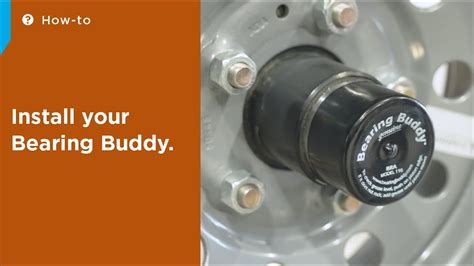
Guide to Installing Bearing Buddy: Achieving Optimal Trailer Hub Maintenance
Introduction:
Preserving the longevity and performance of your trailer hubs is paramount for safe and reliable towing. Among the crucial components is the bearing buddy, a device designed to protect and lubricate the wheel bearings of your trailer. Installing a bearing buddy can be a straightforward task with the proper tools and steps, ensuring your trailer remains in top condition.
Understanding the Bearing Buddy System:
Bearing buddies are reservoirs mounted on the trailer hub that dispense grease into the bearing assemblies. The continuous supply of grease minimizes friction and wear, preventing rust and corrosion. The system comprises a clear polycarbonate reservoir, a piston, and a check valve, providing a visual indication of grease levels and preventing grease expulsion during submersion.
Essential Tools and Materials:
Before embarking on the installation process, gather the following:
- Bearing buddy kit
- Grease gun
- Marine-grade grease
- Socket wrench
- Torque wrench
- Rags
Step-by-Step Installation Guide:
-
Prepare the Hub: Remove the hubcap and loosen the castle nut using a socket wrench. Do not fully remove the nut.
-
Extract the Old Bearing Buddy: Using a flathead screwdriver, gently pry the old bearing buddy away from the hub.

-
Install the New Bearing Buddy: Apply a thin layer of marine-grade grease to the o-ring on the new bearing buddy. Carefully slide it onto the hub and tighten it securely using your fingers.

-
Tighten the Castle Nut: Hand-tighten the castle nut, then use a torque wrench to tighten it to the manufacturer's specifications.
-
Grease the Bearing Buddy: Using a grease gun, pump grease into the bearing buddy until the reservoir is full and the check valve engages.
-
Secure the Grease Fitting: Screw on the grease fitting and tighten it using a wrench.
-
Reinstall the Hubcap: Place the hubcap back on and secure it.
Importance of Regular Maintenance:
Maintaining your bearing buddies is crucial to their longevity and effectiveness. Here are some key maintenance tips:
- Regularly inspect the bearing buddies for any damage, leaks, or loose connections.
- Replenish the grease as needed, ensuring the reservoir remains full.
- Check the grease level before and after submerging your trailer in water.
Common Mistakes to Avoid:
-
Overtightening the Castle Nut: Excessive tightening can damage the bearing or axle.
-
Using the Wrong Grease: Always use marine-grade grease specifically designed for trailer hubs.
-
Neglecting Regular Maintenance: Ignoring your bearing buddies can lead to premature bearing failure and costly repairs.
Advanced Features:
-
Illuminated Sight Glass: Some bearing buddies feature illuminated sight glasses, allowing you to monitor grease levels in low-light conditions.
-
Self-Lubricating: Self-lubricating bearing buddies automatically dispense grease, eliminating the need for manual lubrication.
-
Corrosion-Resistant: Marine-grade materials in bearing buddies protect them from corrosion caused by salt water or harsh environments.
Call to Action:
Installing and maintaining bearing buddies is essential for extending the life of your trailer hubs. By following the steps outlined in this guide and adhering to regular maintenance practices, you can ensure your trailer remains in optimal condition for years to come. Protect your investment and enjoy peace of mind on the road with properly installed and maintained bearing buddies.
Stories of Humor and Lessons Learned:
-
The Case of the Greasy Hands:
- A novice mechanic, eager to install his bearing buddy, applied grease excessively to all the components.
- As he finished the installation and attempted to tighten the castle nut, a large glob of grease squeezed out and landed on his face.
- Lesson Learned: Use grease sparingly.
-
The Underwater Adventure:
- A seasoned boater proudly proclaimed that he had never checked his bearing buddies despite years of launching his trailer into saltwater.
- One day, while towing his boat, a bearing seized, sending his trailer careening into a ditch.
- Lesson Learned: Regular maintenance prevents costly mishaps.
-
The Magic Lightshow:
- A tech-savvy boater installed bearing buddies with illuminated sight glasses.
- One evening, while driving through a dark campground, he accidentally turned on the illumination while towing.
- The bright blue light emanating from his hubs illuminated the way for fellow campers, earning him the nickname "Trailer Disco."
- Lesson Learned: Even essential maintenance can create unexpected spectacles.
Tables:
Table 1: Bearing Buddy Specifications
| Feature |
Description |
| Capacity |
3.5 ounces (standard) |
| Grease Type |
Marine-grade |
| Temperature Range |
-20°F to 150°F |
| Material |
Polycarbonate, stainless steel |
Table 2: Estimated Bearing Buddy Lifespan
| Environment |
Lifespan |
| Freshwater |
5-7 years |
| Saltwater |
2-4 years |
| Harsh Conditions |
1-3 years |
Table 3: Estimated Cost of Bearing Buddy Installation
| Component |
Cost |
| Bearing Buddy Kit |
$20-$50 |
| Labor (if hired) |
$50-$100 |
| Grease Gun |
$20-$50 |
| Total (DIY) |
$40-$100 |
| Total (Professional) |
$70-$150 |
Additional Resources:
